Free Shipping Over $299.99
Orders of $299.99 or more ship free within the continental U.S.
Shipping to Alaska and Hawaii is additional and not included.
We do not ship international at this time.
K-Series Camshaft Installation
Tools Required
- 19mm socket
- 17mm socket
- 12mm socket
- 10mm socket
- .050 allen wrench
- bungee cord
- adjustable wrench
- 8mm allen wrench (socket style is preferred)
- accurate torque wrench (5ft lbs to 70ft lbs with 1 lbs increments)
- valve adjustment tool
- feeler gauges - .21mm to .32mm (.008in to .013in)
- scraper
- Hondabond
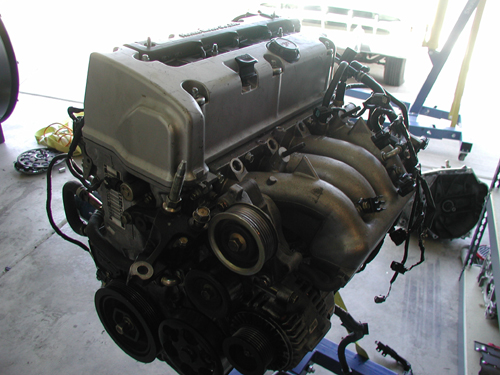
The install was done outside of the car to get better pictures. You can click on any of the thumbnails to see a larger picture. If you are not sure on any step of this process, do not attempt to do the install. This was only done as a reference tool to help out those who are comfortable with the steps and have experience working on engines. This install should not be attempted by any first timers.
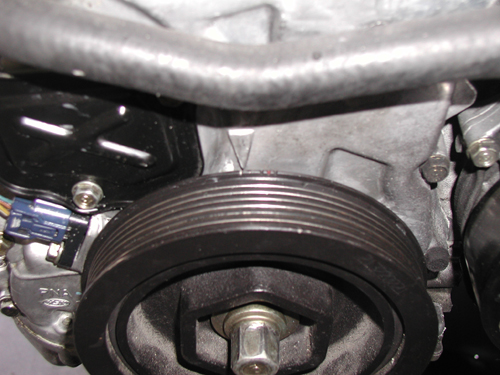
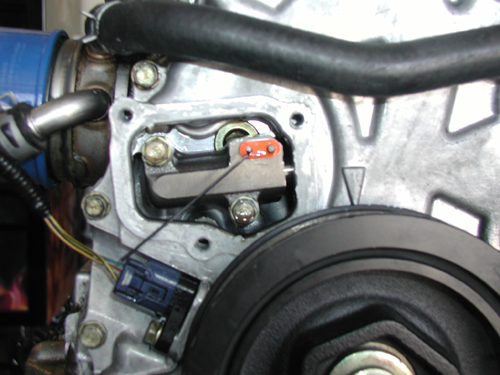
Step One
Set the motor to top dead center. This is done by turning the motor using the crank pulley bolt and a 19mm socket. You can see the white line on the crank pulley and that should line up with the arrow on the timing cover. This is hard to see in the car so I recommend using a mirror or taking off the serpentine belt to help you see it better.
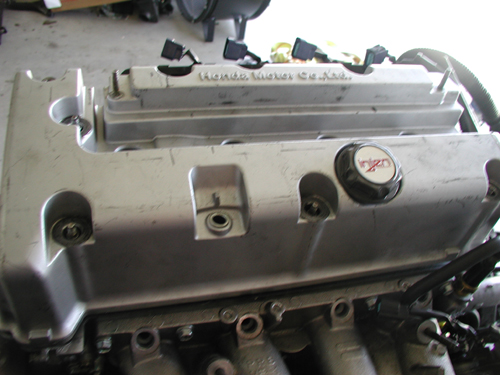
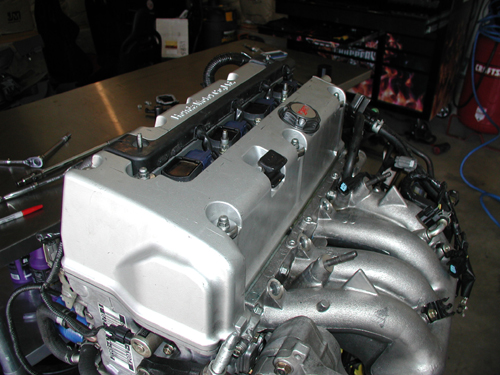
Step Two
Remove the four ignition coils and then 6 bolts that hold on the valve cover.
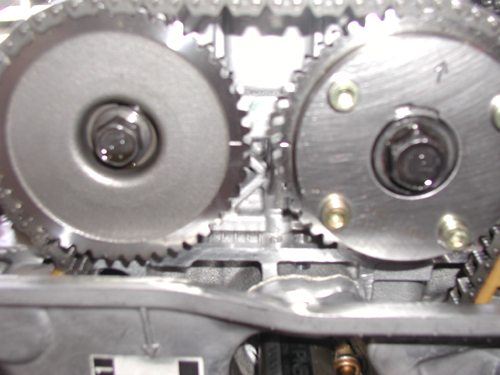
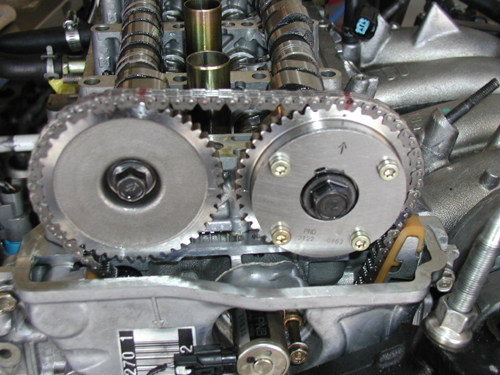
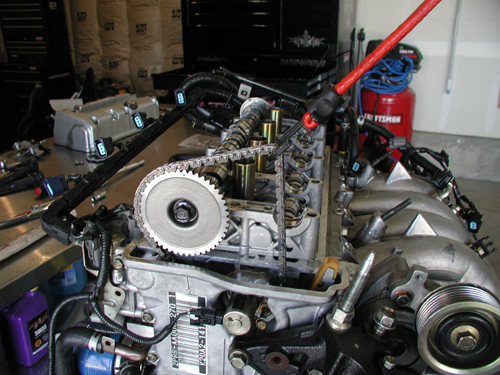
Step Three
Once the valve cover is removed, make sure the lines on the cam gears are lined up with each other. If they are away from each other you need to turn the motor over 180 degrees and they will line up.
Step Four
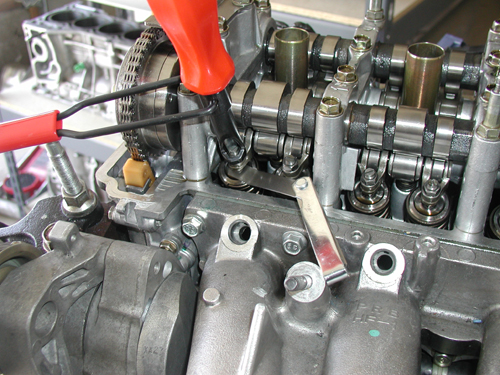
Remove the tensioner cover (black cover) on the timing cover and put a .050 allen wrench into the tensioner.
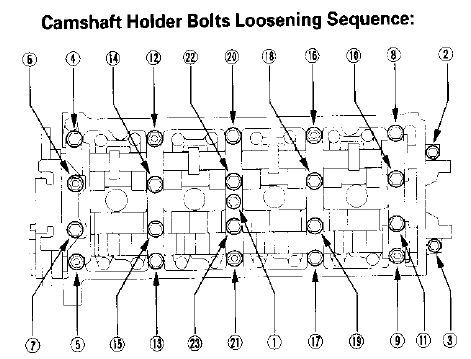
Step Five
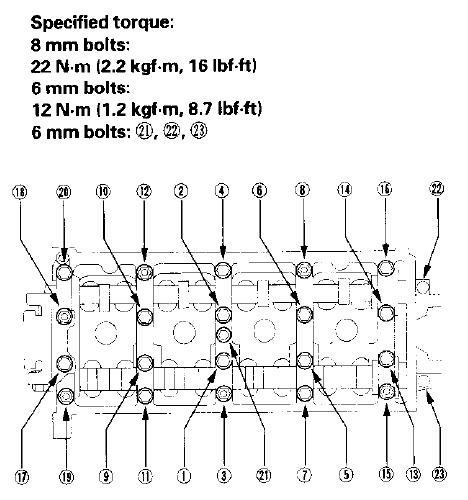
Remove the cam bolts following the pattern in the picture.
Step Six
Using a sharpie mark the cam chain where the dots are on the cam gears. This will help you when you reinstall the cams.
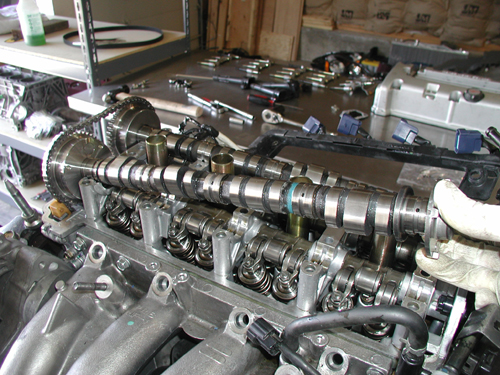
Step Seven
With the caps removed, lift up on the camshaft to help with the removal. You are going to slide the cam out through the chain. Be careful not to damage anything and take your time. It will take some time to get the cam gear and the chain apart. If you lift up on the camshaft it helps and as well as moving the cam gear toward the inside of the motor. Only replace one cam at a time, do not take them both out. Remove either the intake or the exhaust first and then reinstall before starting on the other one.
Step Eight
With the camshaft removed use a bungee cord to keep tension in the chain. This will also help you when you reinstall the camshaft. If you don't keep tension in the chain it could come off the lower pulley and make the reinstall a little harder. The marks that you made earlier would then be off and the reinstall would just take a bit more time.
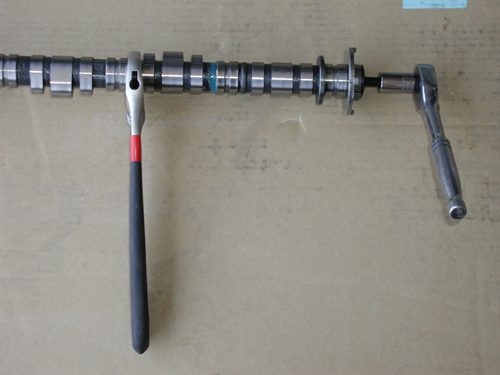
Step Nine
Do not do this step on concrete or a really hard surface, you could damage the camshafts. Using a 17mm socket (intake) or 14mm socket (exhaust) and adjustable wrench, remove the cam gear from the camshaft. Install the gear onto the new camshaft putting some oil onto the threads of the bolts. Tighten the intake cam gear bolt to 83ft lbs and the exhaust cam gear bolt to 51ft lbs.
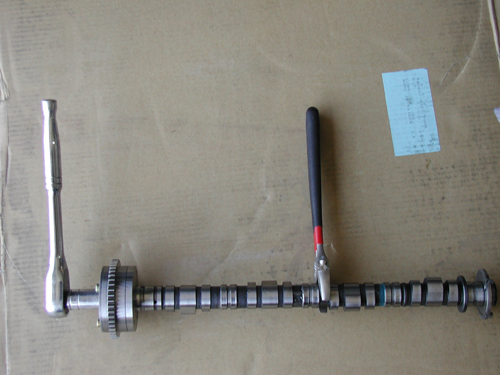
Step Ten
Do not do this step on concrete or a really hard surface, you could damage the camshafts. Using an 8mm allen wrench (socket style is preferred) and an adjustable wrench, remove the pulse plate (camshaft location indicator). Install the pulse plate onto the new camshaft and tighten it down to 29ft lbs.
Step Eleven
Install the camshaft by sliding it back through under the chain. This is where the lines you made early help. Line up the line and the dot on the cam gear and the lines on the cam gears should line back up. It might take a bit of messing around to get them lined up but they will. This is one of the longest steps and you can't take any short cuts here. These lines have to line up exactly or the car will not run properly if at all.

Step Twelve
With both camshafts installed start to tighten down the caps. Follow the pattern in the picture. Make sure you take you time because you can break a camshaft if you are not careful. I normally use a three step process. I follow the pattern doing them hand tight. I then go back through the same pattern making them hand tight again. Then I tighten everything down to 16ft lbs follow the pattern for a third time. It might take a little longer but you run the smallest risk of something breaking or warping.
Step Thirteen
Now you need to do the valve lash. Make sure you only adjust valves that do not have any pressure on them. You will need to turn the motor over 180 degrees to adjust all of them. Here are the specs from Honda:
K20A3 Engine
Intake: .21 - .25 mm (.008 - .010 in)
Exhaust: .28 - .32 mm (.011 - .013 in)
K20A2 Engine
Intake: .21 - .25 mm (.008 - .010 in)
Exhaust: .25 - .29 mm (.010 - .011 in)
Step Fourteen
Install the valve cover and ignition coils.
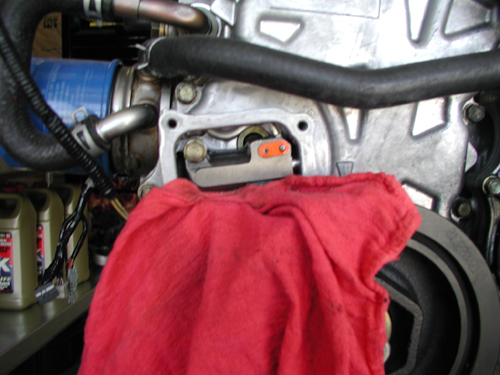
Step Fifteen
Remove the allen wrench from the tensioner and clean off the Hondabond around the opening using a sharp scraper. Take your time, you don't want any pieces falling into the oil pan. I recommend putting something in the hole to protect it while you are scraping the top and the sides.
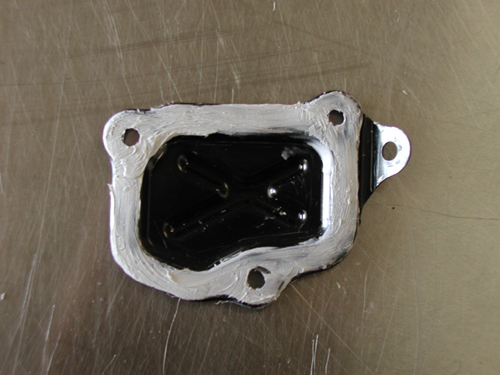
Step Sixteen
Using a sharp scrapper, clean off the back of the tensioner cover. This will help with sealing to the timing cover to make sure no oil leaks out.
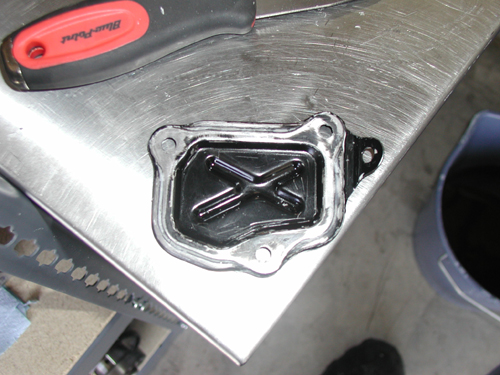
Step Seventeen
Put a line of Hondabond onto the back of the cover and spread it around to ensure a tight seal. Reinstall the tensioner cover and you should be good to go.
Step Eighteen
Let the car idle (2000RPM for 20 minutes) for a few then take it for a light drive to make sure everything is working ok and that there are no leaks or no error codes. If you are getting an error code use a scan tool to check it out. The most likely code after this install is P0341 which is a cam timing error. That means that your cams are out of alignment and you need to go back through all the steps to realign them properly.